Your first login on a cluster
preparations
Take a look on basic cluster documentation and try to make familiar with some basic gnu-commands.
identify/change your standard login-shell
Most of our examples are written for bash, as are most examples you find on the www; in contrast, university accounts older than August 2022 have tcsh set as the default login shell.
How to check or change my login shell
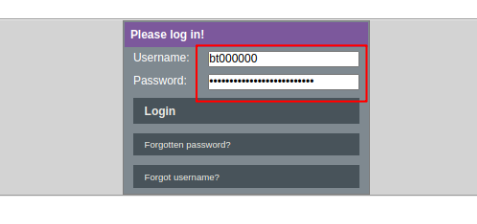
To identify or change your login shell you first have to login at ubt selfservice portal:
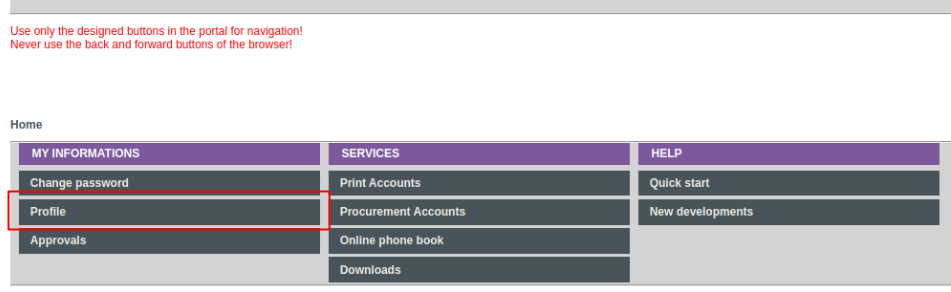
Now navigate to “MY INFORMATIONS”>”Profile”:
In your profile settings look for “Loginshell”:
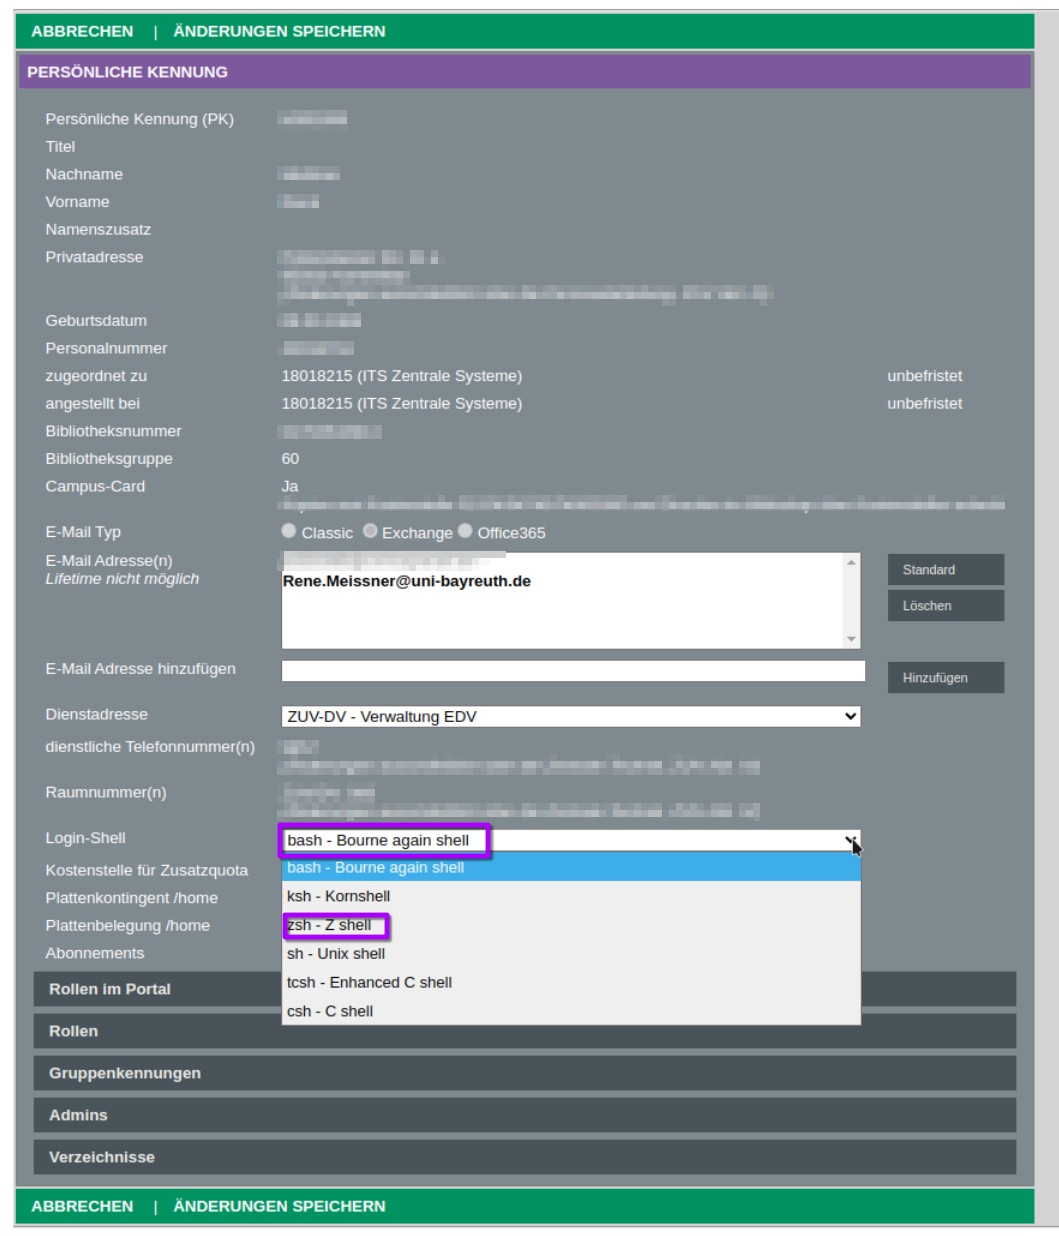 If bash or zsh is set as your loginshell you could simply exit by “cancel” and then log out. If not its recommend to change login shell to bash or zsh and then apply changes by click “SAVE CHANGES”. It can take up to a day for these changes to be passed on to all systems.
login on a cluster
If you have opened a terminal or console-app you just simply need to type:
ssh bt000000@festus.hpc.uni-bayreuth.de
to login on one of festus login-nodes. bt000000 has to be replaced by your personal userid.
transfer data
For this example you first have to create a textfile named ‘myfile.txt’ on your local computer and use your terminal app to navigate the place where the file is stored.
To transfer the file from your local computer to the home directory of the cluster you could use:
scp myfile.txt bt000000@festus.hpc.uni-bayreuth.de:/home/xy/bt0000xy
To transfer a file from the cluster to your local computer (execute this on your local computer:):
scp bt0000xy@festus.hpc.uni-bayreuth.de:/home/xy/bt0000xy/myfile.txt myfile.txt
If you want to transfer directories you have to use the ‘-r’ option of scp;
so scp ... becomes scp -r ...
Experienced linux users are recommended to use rsync instead of scp. Rsync has more advanced sync options and ist usually faster than scp.
submit your first job
To submit your first job you need a job-script respectively submission-script first:
1 2 3 4 5 6 7 8 9 10 11 12 13 | |
First save this script somewhere into your $HOME on the cluster under the name “1_hello” then submit your first job by:
sbatch ./1_hello
Now, depending on cluster workload, a few seconds/minutes later should be two new files in the directory where you submitted the job and you should receive a mail to your university mail account.
The first file should be something like “hello_cat ./hello_<somenumbers>.err
The second file should be named almost the same but ending with “.out” instead “.err”, look into it the same way as shown above. This is the file where the normal output gets stored.
Congrat! You submitted your first job!
Line by line explanation
Now lets look what it is about with this script line by line:
#!/bin/bash
#SBATCH --job-name="hello"
#SBATCH --nodes=1
#SBATCH --mail-user=bt000000@uni-bayreuth.de
#SBATCH --mail-type=END,FAIL
#SBATCH --time=0-00:00:30
#SBATCH --error=%x_%j.err
#SBATCH --output=%x_%j.out
echo "Hello $USER, my name is $HOSTNAME."
>&2 echo "This is an example error message from $HOSTNAME"
echo
echo "Well done $USER you submitted your first job!"